


A nail file is one of the easiest tools to use, but improper technique can result in common problems like splitting, rough edges, and damage to the nail, skin, or cuticles. If you're doing your own manicure at home or working as a nail technician, it's important that you learn how to file nails properly.
In this guide, we'll walk you through the correct technique for filing nails and how to choose the right file. We'll also cover cleaning, replacement, and salon hygiene.
Let’s get started.
Why Filing Technique Matters More Than the File Itself
Before you can start filing, you'll need:
- Straight-blade nail clippers to trim away any unwanted length
- A nail file or emery board with the right grit for bare nails or nail enhancements
- A fine nail buffer to smooth the nail or prepare for product application
The technique you use is more important than the tool itself. Even a professional nail file won't give you a desired shape or smooth finish if you're not gentle or if you’re using poor techniques. One common mistake is sawing from side to side.
What Sawing Does to Your Nails
According to the American Academy of Dermatology, you can weaken your nails when you file them in a back-and-forth motion. This is because your nails are made from layers of non-living tissue called keratin, and the free edge (the part that extends past the tip of your finger) can be vulnerable to repeated stress and pressure. Use controlled pressure and a gentle motion to reduce that stress.
Aggressive back-and-forth abrasion can roughen the edge of your nails and result in peeling. Repeated heavy filing can also wear down the nail tip and make it thinner and more prone to chipping or breaking.
More so, when you file too quickly, you have less control over where you remove length, leading to uneven shapes. If one side or one of the corners ends up shorter than the other, you may have to file down the opposite side to even it out. This will leave you with shorter nails than you wanted.
Instead, use a slow and controlled motion when you file your nails to avoid breakage, achieve your desired length or shape, and prepare the nail for good product adhesion.
How to Properly File Nails, Step by Step
Step-by-Step Filing Method:
- Start With Clean, Dry Nails: Remove nail polish and trim your nails to your desired length. Wash your hands to remove natural oils and wait for them to dry properly.
- Choose the Correct Grit for the Nail Type: Natural nails need a finer grit file than nails with acrylic or hard gel.
- Position the File Carefully: Hold your file perpendicular (at a 90-degree angle) to the tip of your nail. If you have shorter nails, tilt the file at a 45-degree angle right under the free edge to smooth it out, and if you have round or oval nails, hold the file against the side walls at a 45-degree angle.
- Move in One Direction Only: Start from one outer corner and sweep the file toward the center of the nail. Lift the file after each stroke and return to the same corner. Do the same on the other side of the nail.
- Check Both Sides for Symmetry Before Finishing the Tip: Compare the left and right sides. If you notice any small differences, correct them before finishing the tip.
- Refine the Edge: Finish with a fine-grit buffer where needed. Use gentle strokes to smooth rough edges.

Common Mistakes to Avoid:
- Sawing Back and Forth: Don’t move the nail file back and forth in a sawing motion, as it can weaken the nails and cause splitting or ragged edges. Move in one direction instead.
- Filing Wet Nails: Don’t file wet nails; let them dry first. Wet nails are easier to over-file and more likely to tear or peel.
- Using the Wrong Grit: A file that's too coarse can wear down the protective nail plate and result in weak and brittle nails. In the same way, a nail file with a fine grit will perform poorly on acrylic or gel nails.
- Filing Too Close to the Skin: Be careful of filing into the cuticle area or pressing the file against the skin or cuticles around the nail. Keep the file on the nail edge you want to refine.
- Applying Too Much Pressure: Heavy pressure reduces the length or thickness of your nails faster than you can control. Gentler strokes, on the other hand, give you more control, so you know when to stop.
How to Choose the Right Nail File Grit
Grit refers to how coarse or fine a nail file is, and it ranges from 80 to 600 and beyond. The lower the grit number, the more abrasive the surface.
Simply put:
- Lower Number = coarser file
- Higher Number = finer file
Grit Guide by Nail Type:
- 80 to 100 Grit: These are very coarse files. Use them to shape sidewalls and the free edge, remove bulk from acrylic or hard gel, or to shorten long extensions quickly.
- 150 Grit: This file is coarse enough to shorten artificial nails and reduce thickness. It gives you more control than an 80 or 100 grit file.
- 180 Grit: Medium-coarse and suitable for shaping and shortening strong, healthy natural nails with gentle pressure. It can also smooth bumps and blend transition zones on acrylic and gel extensions.
- 240 Grit and Finer: Fine enough to smooth bare fingernails and nail tips without removing too much nail. These grits also work well if you want to prep the surface before polish or gel.
Matching Buffers to the Job
Nail buffers work differently from nail files, although the same grit-number rule applies. Their finer abrasive surfaces smooth micro-scratches from files and prepare the nail for polish.
The right grit on your buffer will depend on how much refinement the nail surface needs:
- 100/180 Buffer: Use a 100/180 buffer to smooth harsh file lines and remove excess product and deeper imperfections on acrylic or hard gel. Don’t use these coarse grits on natural nails.
- 180 to 280 Buffer: This grit works best when you want to smooth scratches from filing, soften natural ridges, or prep the nail surface before applying any product.
- High-Shine Buffer: This one creates a clear-coat, high-gloss, professionally manicured look, even without applying any top coat.
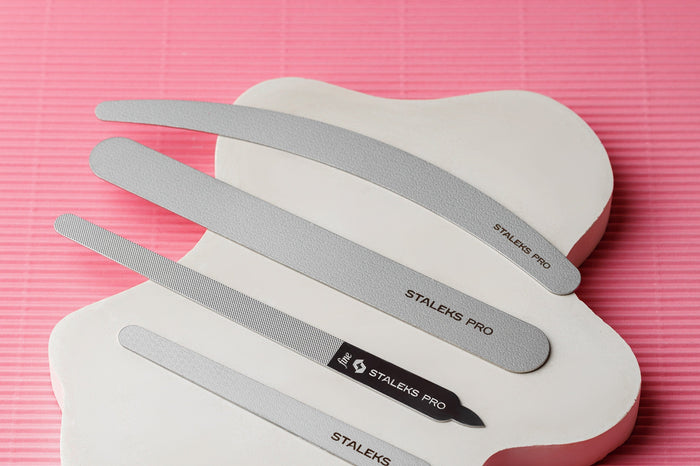
Here at F.O.X Nails USA, we curate nail files and buffers from Staleks, The GelBottle, Kokoist and our own F.O.X Nails brand in 100, 150, 180, and 240 grit options. This includes dual-grit and disposable styles for different stages of filing and single-client use.
Nail Files for Natural Nails vs. Gel and Acrylic
Natural nails need a gentle touch because every stroke removes part of the nail's keratin layer. With gel and acrylic, you’re filing cured product, so you can use more pressure and a coarser grit when needed.
Natural Nail Considerations
Stick to 180 grit or finer. Anything coarser can remove too much of the nail and increase the risk of thinning, peeling, or splitting. If you’re working on softer or more fragile nails, a 240-grit file offers a gentler option. Also, use light pressure and just a few strokes.
Expert Tip: Count your strokes and lift the file after each one to avoid moving back and forth in the same spot.
Gel and Acrylic Considerations
Hard gel and acrylic are tougher than natural nails. In this case, use 80 to 150 grit for shortening, shaping, or removing bulk. Once the main shape is in place, move to a finer grit for smaller corrections and to smoothen the surface.
Expert Tip: Prep cured gel or acrylic with a 180-grit file or buffer before applying gel polish to improve adhesion and extend how long the polish lasts.
Using an E-File Alongside Hand Filing
An e-file or nail drill helps with faster removal of product and prep work, while a hand file is better for shaping the free edge, cleaning up sidewalls, and making small corrections. Many nail techs use both during the same service, of course, depending on what they need to do.

When an E-File Makes Sense:
- Faster Cuticle Work: With the right bit and technique, an e-file can speed up product removal, shape and smooth gel or acrylic, and help with cuticle prep. Use extra care around the cuticle area and sidewalls. A slip here can easily nick the skin or cuticles.
- Consistent Results: An e-file can remove and refine gel products more evenly. It reduces repetitive hand filing during back-to-back appointments.
What to Look for in a Handpiece
- Weight and Balance: Choose a handpiece that feels light and balanced in your hand, especially if you work through several clients a day. A heavy or poorly balanced handpiece is harder to control and can leave your hand and wrist feeling tired.
- Warranty Coverage: Check the warranty length before buying, especially if you’ll use the drill throughout the day. Our Saeshin nail drills are made in Korea and come with a 12-month manufacturer warranty.
Caring for and Cleaning Your Nail Files
How you care for a nail file depends on whether it is reusable or disposable. Clean and disinfect reusable files, such as glass nail files, between each client to maintain hygiene. Discard single-use files, such as traditional paper emery boards, after every client.
Cleaning Reusable Files
- Brush Off Dust: Use a stiff nail brush to remove nail dust and product particles before washing.
- Wash and Dry Fully: If the file is washable, such as some metal, plastic, or glass files, rinse it in warm, soapy water and let it air-dry completely before storing or using it again.
When to Switch to Disposable
- Between Clients: Use a fresh disposable file for each client, or clean and disinfect reusable files after every use to prevent cross-contamination.
- Signs of Wear: Replace the file when the abrasive feels noticeably smoother, wears down unevenly, starts lifting from the base, or the file bends, cracks, or loses its shape.
FAQs
How Often Should You File Your Nails?
There isn't a golden rule. File once a week to fix or maintain your nail shape and manage new growth. File immediately if you notice a split, tear, or rough or sharp edge to prevent it from extending down the nail bed.
Can You Use the Same File on Natural and Acrylic Nails?
Yes, a dual-grit file can be used on both natural and acrylic nails, as long as you use the correct side. On a 100/180 grit file, use the coarser side to shorten and shape acrylic nails, and the 180-grit side to smooth natural nails and tidy up the nail shape.
What Grit Is Safest for Weak or Fragile Nails?
A softer nail file with a grit of 240 or finer is a safer choice for weak natural nails because it's gentler and less likely to take off too much nail. Use a light hand and only file as needed to smooth edges or fix shape.
Should Nails Be Wet or Dry Before Filing?
File your nails when they’re dry. Water softens the nail, making it more flexible and prone to bending, splitting, or peeling while you file.
What Is the Correct Filing Motion?
File from the outside edge toward the center in one direction. Avoid sawing back and forth, which weakens natural nails.
How Do You Know When a Nail File Needs Replacing?
Replace it when the abrasive feels worn down or no longer files properly. Discard disposable salon files after use.
What Is the Difference Between a Nail File and a Buffer?
A nail file shortens, shapes, and perfects edges, while a buffer smooths surfaces, reduces ridges, and adds shine.
Do Disposable Nail Files Work as Well as Reusable Files?
Yes, a professional disposable file works just as well as a reusable one, as long as you choose the right grit. They're practical for salons because you can use a fresh one for each client.
What Torque Do You Need for Pedicure E-File Work?
We recommend at least 3.0 Ncm of torque for pedicure work because toenails tend to be thicker and require more power.
How Do You Fix Uneven Nails After Filing?
Gently file the longer or heavier side until the nails look even. Check the shape of the nail against the finger as you go to avoid filing off too much length. For a rounded shape, compare the corners and curved edge on both sides before making any final strokes.
Conclusion
Proper nail filing comes down to good technique and the right grit for the job. On natural nails, keep strokes light, file in one direction, and avoid coarse grits that can weaken the nail. On acrylic and hard gel, use a more abrasive file for shortening and shaping, then switch to finer grits for smoothing and finishing.
The main thing is to match the file to the nail you are working on instead of reaching for the same grit every time. That gives you more control, helps prevent over-filing, and makes it easier to achieve your desired result.
Ready to restock your station? Here at F.O.X Nails USA, we offer nail files and buffers in a wide range of grits for natural nails, gel, acrylic, and everyday salon use.
References
- American Academy of Dermatology Association. How to trim your nails. (n.d)


