


Getting a good eyebrow tint result isn't just about applying the product and waiting for the timer. You can use the same technique you've used before and still end up with patchy color, an unexpected warm tone, or brows that are darker than your client wanted. Different tint brands use different ratios, developers, and processing times. So, what works for one may not work for another.
That's where things can get confusing, especially when you're working with a new tint. The basic application technique stays much the same, but you still need to understand the product you're using and follow its instructions. This guide takes you through the process from start to finish, including preparation, formula and shade selection, application, troubleshooting, and aftercare.
What Tools Do You Need to Tint Eyebrows?
Before we get into the step-by-step tutorial on how to tint eyebrows, make sure you have the tint, compatible developer, and application tools you need.
You'll typically need:
- Brow tint
- Compatible developer or oxidant
- Non-metallic mixing dish
- An angled or flat brow brush for precise product application
- Spoolie brush to comb and position brow hairs
- Cotton swabs (Q-tips) to clean stray tint and sharpen the brow edges while the tint processes
- Cotton pads and water for gently removing the tint after the tint has finished processing
- Petroleum jelly (Vaseline) for creating a barrier around the brows to help prevent unwanted skin staining
- Gloves
- Brow cleanser or degreaser to remove makeup, skincare, and excess oils before application
- Skin color remover for accidental stains outside the brow shape
- Timer to track processing time accurately
Most professional brow tints use a two-part system: a tint and a compatible developer or oxidant. The tint holds the pigment, and an oxidant or developer activates it. Mix them in the exact ratio the manufacturer specifies, and you get the shade on the box.
Developers are not interchangeable, though. This means that you shouldn't use a developer from one product with another, even if they have the same peroxide percentage. Mixing brands may lead to unpredictable colors, like turning the brows orange, green, or patchy, and it can also increase the risk of skin irritation.
Before Tinting Eyebrows: Consultation & Safety
These are important steps to ensure that you minimize the risk of possible allergic reactions and perform the service safely.
Consultation
Before starting your client’s treatment, conduct a thorough consultation to confirm they are a safe candidate for tinting. You’ll also need to understand the look they wish to achieve.
Use this screening checklist:
- Previous brow/lash tint, hair dye, or black henna reactions? (If yes: prioritize a patch test)
- Recent hair removal (waxing, threading, tweezing) within 24–48 hours? (If yes: Reschedule tinting to prevent chemical burns on open pores.)
- Recent use of active skincare (retinoids, AHAs/BHAs, chemical peels)? (If yes: Pause active use around the brows for 3–5 days prior, or postpone service.)
- Cuts, open abrasions, sunburn, eczema, or active acne in the brow area? (If yes: Reschedule until the skin barrier is completely healed.)
- Desired Look: natural, defined, darker, fuller-looking brow?
- Lifestyle Factors: Daily swimming, oil-based cleansers, or self-tanning products will fade the tint faster.
Perform a Patch Test
Even if your client hasn't had a previous brow or lash reaction, it doesn't guarantee they won't react badly to your products, even if they've used the same product before. Sensitivity can build with repeated exposure, and formulations change over time (U.S. Food and Drug Administration, 2025; American Academy of Ophthalmology, 2019). This is why most professional tint systems recommend an allergy skin test, also called a patch test, before you tint anyone's brows.
Eyebrow tints contain some chemicals, specifically para-phenylenediamine (PPD), which is commonly found in dyes. Of 54,917 patients patch-tested by the North American Contact Dermatitis Group (NACDG) between 1994 and 2018, 3,095 (5.6%) had an allergic reaction to PPD, and the face was the most common primary site of dermatitis at 25.5% (Warshaw et al., 2023).
When you perform a patch test for an eyebrow tint, always check your product's instructions, as timing and application methods vary by manufacturer.
Here's a general guide to follow:
- Select a sensitive spot that isn't immediately obvious, like behind the earlobe or the inner bend of the elbow.
- Wash the area with mild soap and water to remove cosmetics or dirt, then pat dry thoroughly.
- Mix a tiny drop of the tint dye with developer according to the manufacturer's exact recommended ratio, then apply a dime-sized spot of the mix onto your chosen area using a cotton swab.
- Leave the dye on the skin for the recommended time given by the manufacturer (typically 10 to 15 minutes). Wipe it off thoroughly with a damp cotton ball or pad.
- If your client feels burning or stinging immediately after application, wash the tint off with cool water and mild soap right away. Don't proceed with eyebrow tinting. Instead, refer the client to a dermatologist or allergist, and note it in their record so no one in the salon books them later.
Instant reactions are rare, though. Because allergic reactions to dyes, like those containing PPD, are a delayed-type hypersensitivity reaction, it may take 12 to 24 hours to see if your client is sensitive. So we recommend doing the test at least 24 to 48 hours before your client's appointment.
Check the Brow Area
The skin around the eyes is thin. This makes it easy to react if you do chemical services like eyebrow tinting on damaged skin. Checking your client's brow area helps you see tiny scratches from tweezing or waxing, dryness, or skin problems like eczema and psoriasis, which dyes can make worse.
Don’t proceed with the tint if you notice any of the following:
- Open abrasions
- Cuts
- Active acne breakouts
- Severe flaking
- Sunburn
- Visible redness/inflammation in or around the brow region
Reschedule the appointment until their skin barrier has fully healed to avoid chemical burns, severe irritation, or sudden allergic reaction.
Professional Hygiene
Your client isn't the only person at risk of having an allergic reaction. Of the 3,095 patients who tested positive for a PPD allergy in the NACDG study, 8.3% developed their allergy through workplace exposure, and 72.8% of those job-related cases were among hairdressers and cosmetologists. Repeatedly touching tint without protection builds sensitivity over time, which is why wearing gloves for every service is important.
Other hygiene protocols to follow include:
- Clean and disinfect your multi-use tools properly after every service
- Dispose of single-use tools immediately.
- Wash your hands thoroughly before putting on gloves and after taking them off.
- Wipe down your treatment bed and work trolley with disinfectant wipes between every client, and always use fresh drapes and towels for each appointment.
- Keep the tint tubes tightly capped when the product is not in use to stop oxidation and contamination. Store clean, disinfected tools in covered, sanitized containers.
How to Tint Eyebrows: Step-by-Step
Step 1: Cleanse and Prepare the Brows
Prep is an important step in achieving flawless brow results. Use an eyebrow shampoo, degreaser, or gentle cleansing foam to wash away makeup, skincare residue, and natural oils from your skin and brow hairs. If you skip this step or use a harsh face wash, it can leave a barrier that blocks the tint and causes patchy, uneven color. Clean skin creates the ideal canvas for maximum color payoff and longer-lasting results.
Once the brow is clean, let it air-dry, or use a lint-free paper towel or cotton pad to pat it dry. Then use a spoolie brush to comb through the brow hairs in their direction of growth to check that moisture isn't trapped at the base of the hair root.
Step 2: Map the Brow Shape
Eyebrow mapping uses a person's facial anatomy, specifically the nose, inner eye corner, and iris, as reference points for where their brows should start, arch, and end.
Everyone's eyes are shaped and spaced differently, so trying to replicate a shape you saw online may not produce a good result on your client. Instead, use their nose as the fixed reference point, as it acts as a central anchor for facial symmetry.
Using a straight tool (such as a marking thread), mark the three key reference points:
- The Head (Start): Hold the tool vertically along the outer edge of your nostril and move it straight up past the inner corner of your eye. Mark where it meets the brow bone.
- The Arch (Peak): Angle the tool from the edge of the nostril straight through the center of the pupil while your client looks straight ahead. Mark the highest point on the top edge of the brow.
- The Tail (End): Angle the tool from the nostril edge past the outer corner of the eye. Mark where the tail should taper off and end.
Once you've marked your points, you can lay a flexible eyebrow ruler across the forehead to make sure both brows align horizontally. Then trace the mapped shape with brow paste using a firm, flat brush. This lets your client see the proposed shape and creates a physical barrier to block tint from bleeding into unmapped skin.

[Image by BLACKDAY, Canva]
Step 3: Mix the Tint
Add the tint and developer from your tinting system in the exact ratio the manufacturer recommends. Mix thoroughly in a non-metallic dish using a plastic micro-spatula or brush handle. Stir until the mixture is completely smooth and uniform. Make sure it is not too thin or runny, because a loose mixture can be difficult to control and might spread outside the marked area, especially around the brow tail.
Mix only the amount you need for your immediate client. Leftover product continues to oxidize once exposed to air, so it loses potency and cannot be saved or used for another service. This is also why you should only prepare your tint mixture immediately before application.
Step 4: Apply the Color
Apply a barrier, such as petroleum jelly, to the skin around the mapped eyebrow shape before tinting. It works as an oil-based shield to keep the pigment from staining unwanted areas and protects your client's skin from chemical irritation.
Follow these steps to apply the tint:
- Start at the Tail: Use a small angled brush and begin applying tint at the middle or tail of the brow, working steadily toward the front.
- Coat Both Sides of the Hair: Press the dye down into the brow hairs instead of just painting across the top. Brush in the direction of hair growth, then come back over the same spot in the opposite direction so the underside of every strand gets fully coated.
- Smooth the Hairs: Lay the brow hairs back into their natural position once you've evenly applied all product.
- Clean Your Lines: Use a damp cotton swab immediately to wipe away any dye that strays outside your mapped shape. Tint left sitting on bare skin for the full processing time can leave a harsh mark.
- Track Your Timing: Once you're done with one brow, set a timer for the processing time recommended by the manufacturer so it doesn't over-process while you work on the second.
Step 5: Let the Tint Process
The length of time you leave eyebrow tint on determines how deep or light the color result will be. Most eyebrow tints process within 5 to 15 minutes, although the exact window varies by product. For example, ZOLA's Eyebrow Tint With Collagen takes approximately 5 to 15 minutes depending on how deep a result you want, and ÉLAN's Deep Brow Tint 2.0 lists 5 to 10 minutes depending on desired intensity.
How long you leave it on within that window will depend on the desired depth of color and the client's brow hair texture. Fine or lighter hairs change color quickly, but coarse, dark, or resistant hairs take longer. For a soft, natural look, wipe the tint off the front of the brow 1 to 2 minutes before the tail.
Expert Tip: Don't leave the tint on longer than recommended to force a deep color. In fact, you should keep processing time conservative to avoid overly dark results. It is much easier to reapply tint for one minute or two to build up light color than to correct brows that have developed too dark.
Step 6: Remove the Tint and Check the Result
Wipe away the tint with a damp cotton pad, following the direction of hair growth. Use a clean part of the pad or a fresh one as it picks up color, so you don't spread the tint back over the skin.
Once the tint is removed, check both brows in good lighting. Look for any differences in color or strength, harsh edges, or areas that need cleaning up before you show the client the finished result.
Finish the service by applying a color lock product like the ZOLA Color Fixation Tonic to seal the hair cuticle, which helps the tint stand out more and last longer.
Step 7: Shape and Tweeze
Perform any waxing, threading, or tweezing only after the tint has been completely removed. Tinting first reveals every fine vellus hair, which will give you an accurate outline to shape without compromising open pores before chemical application.
How Do You Choose the Right Eyebrow Tint?
The right tint depends on your client's natural brow color, density, and their desired finish or needs. Before choosing a product, consider whether they actually need to add color to their brow hair, stain the skin, or do both.
Here are the different types of tint formulas and their use cases:
- Cream or Oxidative Tints mix with a compatible developer to color the hair while leaving a moderate stain on the skin. They are ideal for classic tinting services on standard to full brows.
- Gel Tints have a lighter consistency, which makes precise application easier. They work well for fine brow hairs when you want definition without leaving heavy block color on the skin.
- Henna-Style or Hybrid Stains create more noticeable color on both the skin and brow hairs. They're a good choice when you want more visible skin staining, particularly for sparse brows or clients who prefer a bold, filled-in look.
- Oxidant-Free Formulas are ready-to-use formulas that deposit color without the need for hydrogen peroxide. They process quickly and are gentle enough for sensitive skin or use right after brow lamination and bleaching, when regular oxidative tints might damage the hair.
Always look at your brand's shade chart to see how much to mix and for how long. Don't just follow general rules like going two shades lighter or darker than your client's natural brow color.
What to Do When Eyebrow Tinting Goes Wrong
Even experienced technicians run into unexpected results. When something goes wrong, identify the cause quickly and use these steps to correct it safely:
- The Brows Look Too Dark: Avoid the panic reaction of aggressively scrubbing the brows because it can irritate your client's skin without actually lifting the hair pigment. Instead, saturate a cotton swab with a gentle oil-based cleanser or micellar water and sweep over the dense areas to lift excess skin stain. To prevent this in the future, choose a lighter shade when you're unsure, or let the tint process for a shorter time.
- The Color Is Patchy or Uneven: Patchy results happen when tint fails to reach every hair, either because leftover skin oils block absorption or because your brush technique missed the undersides of the hair shaft. To fix patchy brows immediately, wipe the lighter spots with a damp cotton swab to remove leftover dye residue, then reapply tint directly to those sparse areas for 1 to 2 minutes. You can prevent this in the future by cleaning your clients' brows carefully with a gentle cleanser or eyebrow shampoo. If they have oily skin, degrease twice. Then, press the dye through the hair from both directions so every strand is covered.
- The Color Is Too Light or Faded Too Quickly: This can happen if you guess the developer ratio instead of measuring it, or if you take off the tint too soon. Check your mixing ratio first before thinking that you chose the wrong shade. You can safely apply a fresh batch of tint for 1 to 2 minutes to add more depth.
- One Brow Is Darker Than the Other: This usually happens when the application timer is set at the end of the full application instead of starting immediately after you work on each brow. You can fix this situation by applying a small amount of professional tint remover to the darker brow, or doing a brief 60-second touch-up application on the lighter brow to balance them out. Moving forward, note your start time as soon as you touch the first brow, or work quickly to ensure equal processing time on both sides.
- The Undertone Looks Wrong: If the finished color appears warmer or cooler than expected, don't try to correct it with a random shade or color-wheel formula. Check the manufacturer's color chart and system guidelines for approved neutralizing correctors or tone-adjusting drops to safely balance the tone.
How Do You Care for Brows After Tinting?
After tinting, tell your client how to take care of their brows at home. The first 24 to 48 hours are very important, so you'll have to explain what they should avoid right after the appointment and what daily habits can make the tint fade faster over time. Here are some aftercare tips to pass on:
- First 24 to 48 Hours: Keep the brows completely dry and product-free. Avoid direct water, steam, heavy sweating, and facial cleansers over the brow area. It's also best to keep makeup, moisturizers, and other skincare products away from the brows while the color sets.
- Long-Term Maintenance: Use a gentle, oil-free cleanser around the brow area and avoid applying exfoliating acids, retinoids, or physical scrubs directly over the brows. Frequent exposure to water, heat, exfoliation, and other products can cause the color to fade sooner. Protect the brows from prolonged, intense sun exposure as well, as UV exposure can contribute to premature color fading. Wearing a hat when spending extended time in the sun can provide additional protection.
How Long Does Eyebrow Tint Last?
Most brow tints last between 4 to 8 weeks on average, depending on a person's skin type (oily or dry), how fast their hair grows, and their lifestyle habits.
The skin stain will fade first, and the brow hair color will last longer. Usually, the skin stain softens within 3 to 10 days. The pigment on the brow hairs fades slowly over 3 to 6 weeks as the hairs go through their natural growth cycle and shed.
You can advise your client to re-tint every 4 to 6 weeks. This helps keep their skin stain and hair color consistent, especially if they love to maintain their tinted brow look and enjoy how easy it makes their makeup routine.
Professional Eyebrow Tint Products and Tools to Try
Once you know how to choose and apply an eyebrow tint, the next step is finding products that fit the way you work. We offer a range of professional tints and application tools to suit different techniques and desired results. Here are some products you might want to look at:
ZOLA Eyebrow Tint With Collagen
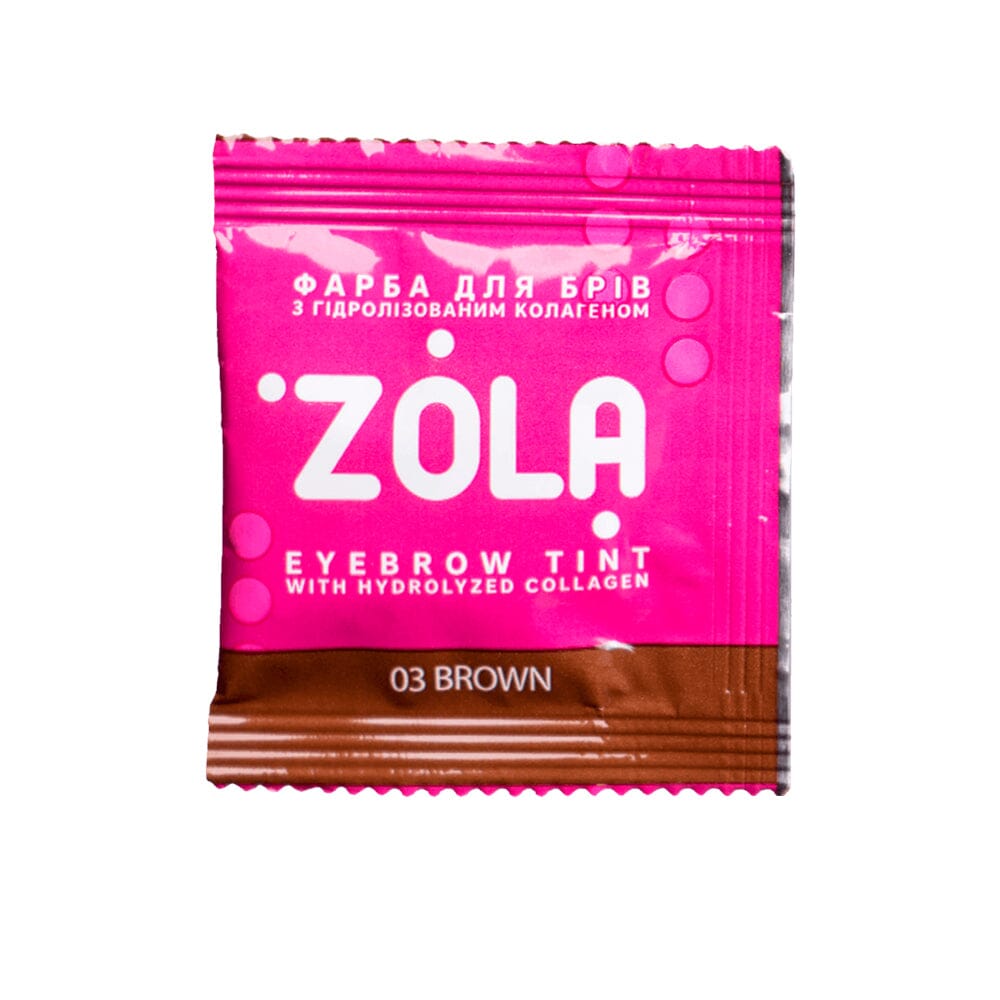
ZOLA Eyebrow Tint With Collagen
Long-lasting color while conditioning the brows
Shop NowZOLA Eyebrow Tint With Collagen is a cream tint that colors the brow hairs and leaves a henna-like stain on the skin. It contains hydrolyzed collagen to add shine and elasticity, and lanolin and sorbitol to hydrate the brows. The creamy texture makes it easy to apply evenly.
The range includes shades such as Light Brown, Warm Brown, Brown, Dark Brown, and Graphite. If you're looking for a versatile shade, 03 Brown suits a wide range of clients, including dark blondes, brunettes, redheads, and clients with classic brown tones. You can also use Graphite on its own or mix it with other ZOLA shades to create a cool custom blend.
Best for: Brow professionals who want a cream tint with visible skin staining and a range of shades for different clients.
ÉLAN Deep Brow Tint 2.0
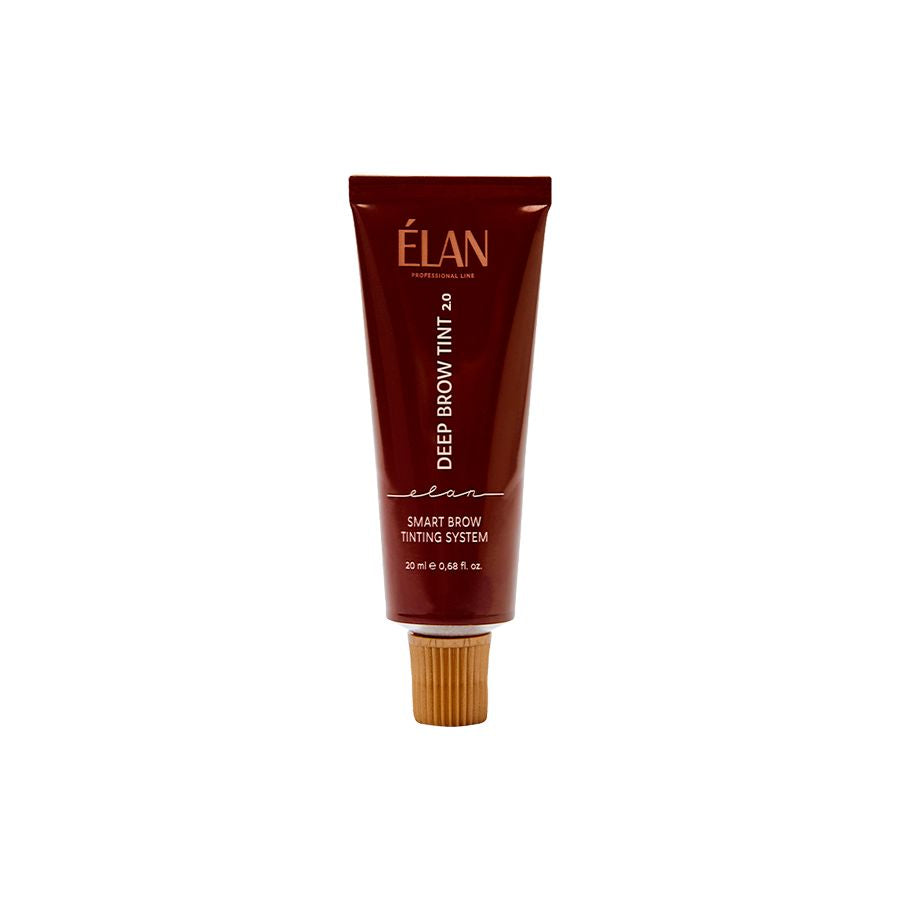
ELAN Deep Brow Tint 2.0
Pleasant scent for a better tinting experience
Shop NowÉLAN Deep Brow Tint 2.0 is designed for professionals who want bold, even color on both the brow hairs and skin. The formula contains Heliogenol™, a sunflower seed extract that helps nourish and strengthen the brow hairs during coloring.
One perk of working with this product is that you can adjust the intensity. You can use the compatible oxidizing emulsions 2% to get a softer, more natural look or 3.5% for a deeper, more vivid finish. The range also includes shades such as Icy Cold Brown, Spicy Warm Brown, and Black, which allow you plenty of options when working with different natural brow colors and desired finishes.
Best for: Brow professionals who want more control over the depth and finish of the final color.
ZOLA Professional Brow Brushes
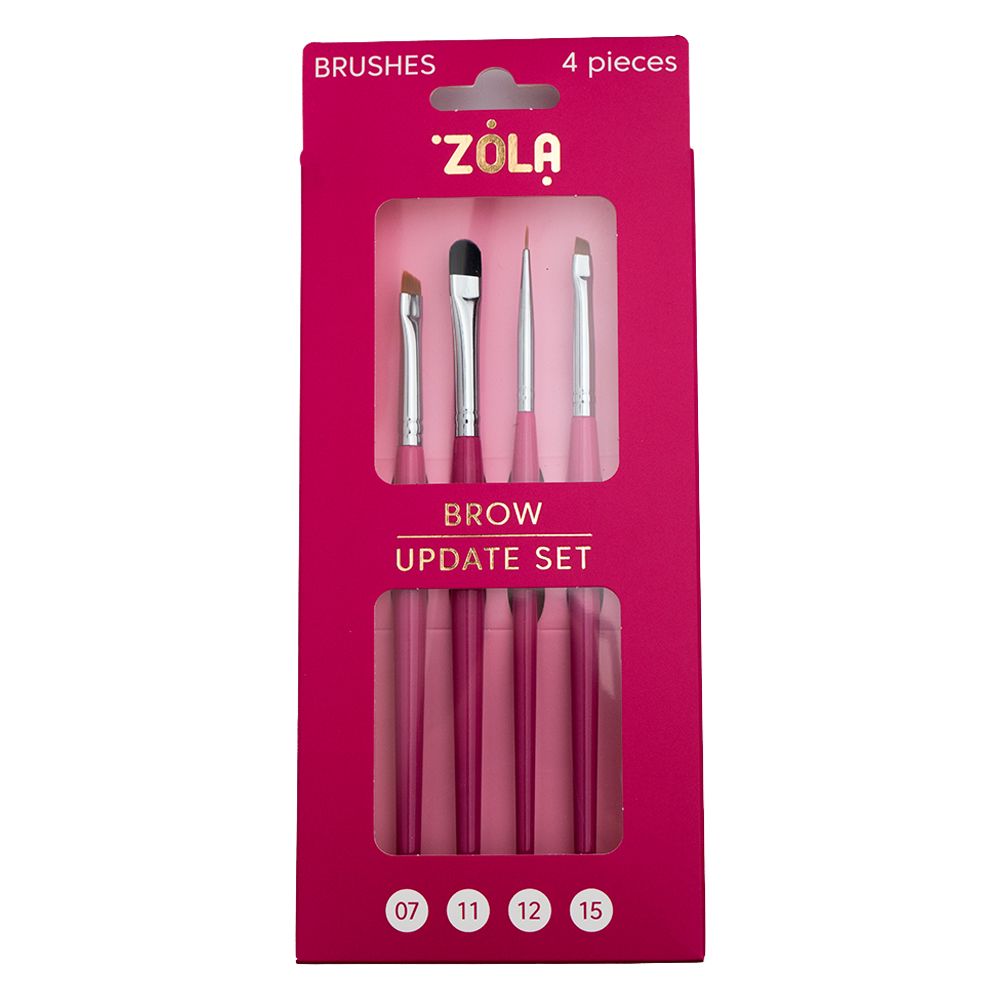
ZOLA Eyebrow Brush Set of 4
Perfect for filling brows with color and building clean
Shop NowYou don't need a large collection of brushes for brow tinting. A good angled brush can give you the control you need for precise application, while other brushes can help with filling, blending, and detailing.
If you're unsure where to begin, you can try the ZOLA Eyebrow Brush Set of 4. It includes a medium angled brush for filling and shaping, an oval brush for even product distribution, a fine-line brush for detailing, and a small angled brush for precise finishing.
Frequently Asked Questions (FAQs)
Does Eyebrow Tint Look Bad at First?
Freshly tinted brows often look darker or more defined on the first few days. This is because the skin underneath the brows gets stained too. After the eyebrow service, let your client know the tint will soften on its own within 24 to 48 hours as their natural skin oils break down the surface dye.
What Are the Risks of Eyebrow Tinting?
The main risks of eyebrow tinting include allergic reactions to the dye, chemical irritation of the delicate skin around the eyes, and accidental eye contact with the dye, which can cause swelling and pain. To reduce these risks, always do a patch test before the appointment, mix the dye to a thick, smooth consistency, and handle your tools carefully.
Do Lighter or Darker Eyebrows Make You Look Younger?
The contrast from having slightly darker, well-filled eyebrows can make the face look younger, but overly dark or harsh shades can age the face. Darkening sparse or fading brows can enhance the face and create a youthful effect. Light brows are great too, depending on a person's skin tone. But making them too light may cause your client to look washed out.
What Do Salons Use for Eyebrow Tint?
Salons use professional-grade oxidative cream tints, gel tints, hybrid dyes, or henna-style stains formulated specifically for use near the eyes. These systems are typically paired with specialized low-percentage developers (typically 1% to 3.5%) or water activators. Some tints come as pre-mixed formulas in a bottle, and they are great if you want to start out by practicing your eyebrow mapping technique without much fuss.
What Is the Best Color to Tint Your Eyebrows?
The best eyebrow tint color is the one that matches your client's skin undertones and natural hair color, and you'll have to factor in their preference or how they like their makeup to look. When you're torn between two colors, choose the lighter one and run a brief second pass if needed, or rely on the manufacturer's shade chart.
How Long Do You Leave Eyebrow Tint On For?
Leave eyebrow tint on for 5 to 15 minutes, depending on the brand and how dark you want the final result. Leaving tint on longer than recommended won't make the hair color much deeper. It mainly darkens the skin stain and raises the chance of skin irritation.
Can You Use Regular Hair Dye to Tint Eyebrows?
Most permanent and semi-permanent hair dyes contain coal-tar derivatives, and using them near the eyes is not a permitted use. Products formulated for scalp hair carry warnings stating you must not use them on eyelashes or eyebrows because they can cause serious eye irritation or blindness. Always choose professional eyebrow tinting products that are made for that purpose, not scalp hair tint.
What Should You Do if Eyebrow Tint Comes Out Too Dark?
Put a little eyebrow tint corrector on a cotton swab, gently swipe it along the brow in one direction, wait a few minutes, and wipe it off with a wet pad. It will help fade some of that extra color. Alternatively, you can use micellar water on a cotton pad to clean the extra stain off the skin under the brow hairs. If the brows aren't overly dark, let your client know it will fade naturally after a few days, especially with normal washing.
How Often Can You Tint Your Eyebrows?
Advise clients to book tinting appointments every 4 to 6 weeks, depending on their natural hair growth cycle and how quickly their tint usually fades.
Always follow safety rules with returning clients. Skin sensitivities and chemical allergies can build up over time, so keep patch testing the skin regularly as the manufacturer recommends.
Should You Wax or Tweeze Eyebrows Before or After Tinting?
Don't wax, tweeze, exfoliate, or apply self-tanner right before a tint service. Tint first, then shape. Tinting before hair removal makes fine vellus hairs along the edges more visible, showing your client's true outline. Whereas waxing or tweezing first opens the pores and weakens the skin, which can make it more prone to chemical irritation.
Conclusion
Getting the best results with eyebrow tinting is easy if you follow a few simple steps. First, prep the brow hairs. Next, outline a shape that fits the face. Then, choose a shade that matches the client's natural hair color.
Finally, watch the processing time closely to prevent the brows from becoming too dark or causing irritation. It's a straightforward process, and it gets easier the more you practice and try different brow shapes, colors, and tint formulas.
Remember, mixing ratios and oxidant strengths aren't strict rules. Follow the manufacturer's advice because it can change depending on the product.
If you're stocking up or trying a new professional tinting system, we have a wide selection of ZOLA cosmetics and ÉLAN options for brows and lashes, plus the tools and brushes you'll need.
References
- American Academy of Ophthalmology. (2019, December 11). Know the risks of eyebrow and eyelash enhancement (C. Vimont).
- U.S. Food and Drug Administration. (2025). Hair dyes.
- Warshaw, E. M., Peterson, M. Y., Atwater, A. R., DeKoven, J. G., Pratt, M. D., Taylor, J. S., Belsito, D. V., Silverberg, J. I., Reeder, M. J., DeLeo, V. A., Houle, M. C., Dunnick, C. A., Yu, J., Adler, B., Mowad, C., & Botto, N. C. (2023). Patch testing to paraphenylenediamine: The North American Contact Dermatitis Group experience (1994-2018). Dermatitis, 34(6), 536-546.


